
Integration Using the REST API Client with Acumatica’s Manufacturing Module
Introduction
Manufacturing Module Integration
When integrating a third-party application with the Manufacturing Module, there are several transactions that are frequently needed:
- Material Issues
- Move Entry
- Labor Entry
The use-case for this article is to create a single integration process that can create inventory transactions, such as inventory adjustments, and manufacturing transactions, such as labor entry, even though these two transaction types are defined in different endpoints.
To start, you can first download the related GitHub repository at this link:
Acumatica/AcumaticaRESTAPIClientForCSharp (github.com)
There is some interesting information in this GitHub repository, including an example Console Application. The readme.md file contains a quick explanation of the contents of this repository as well.
I created a Visual Studio solution, and installed the following NuGet packages:
- JsonSubTypes (>= 1.8.0)
- Newtonsoft.Json (>= 13.0.1)
- RestSharp (>= 107.1.1)
- System.Text.Json (>= 6.0.1)
Next, I installed the 3 Acumatica NuGet packages specifically needed for Acumatica Integration. I chose the most recent versions in all cases.
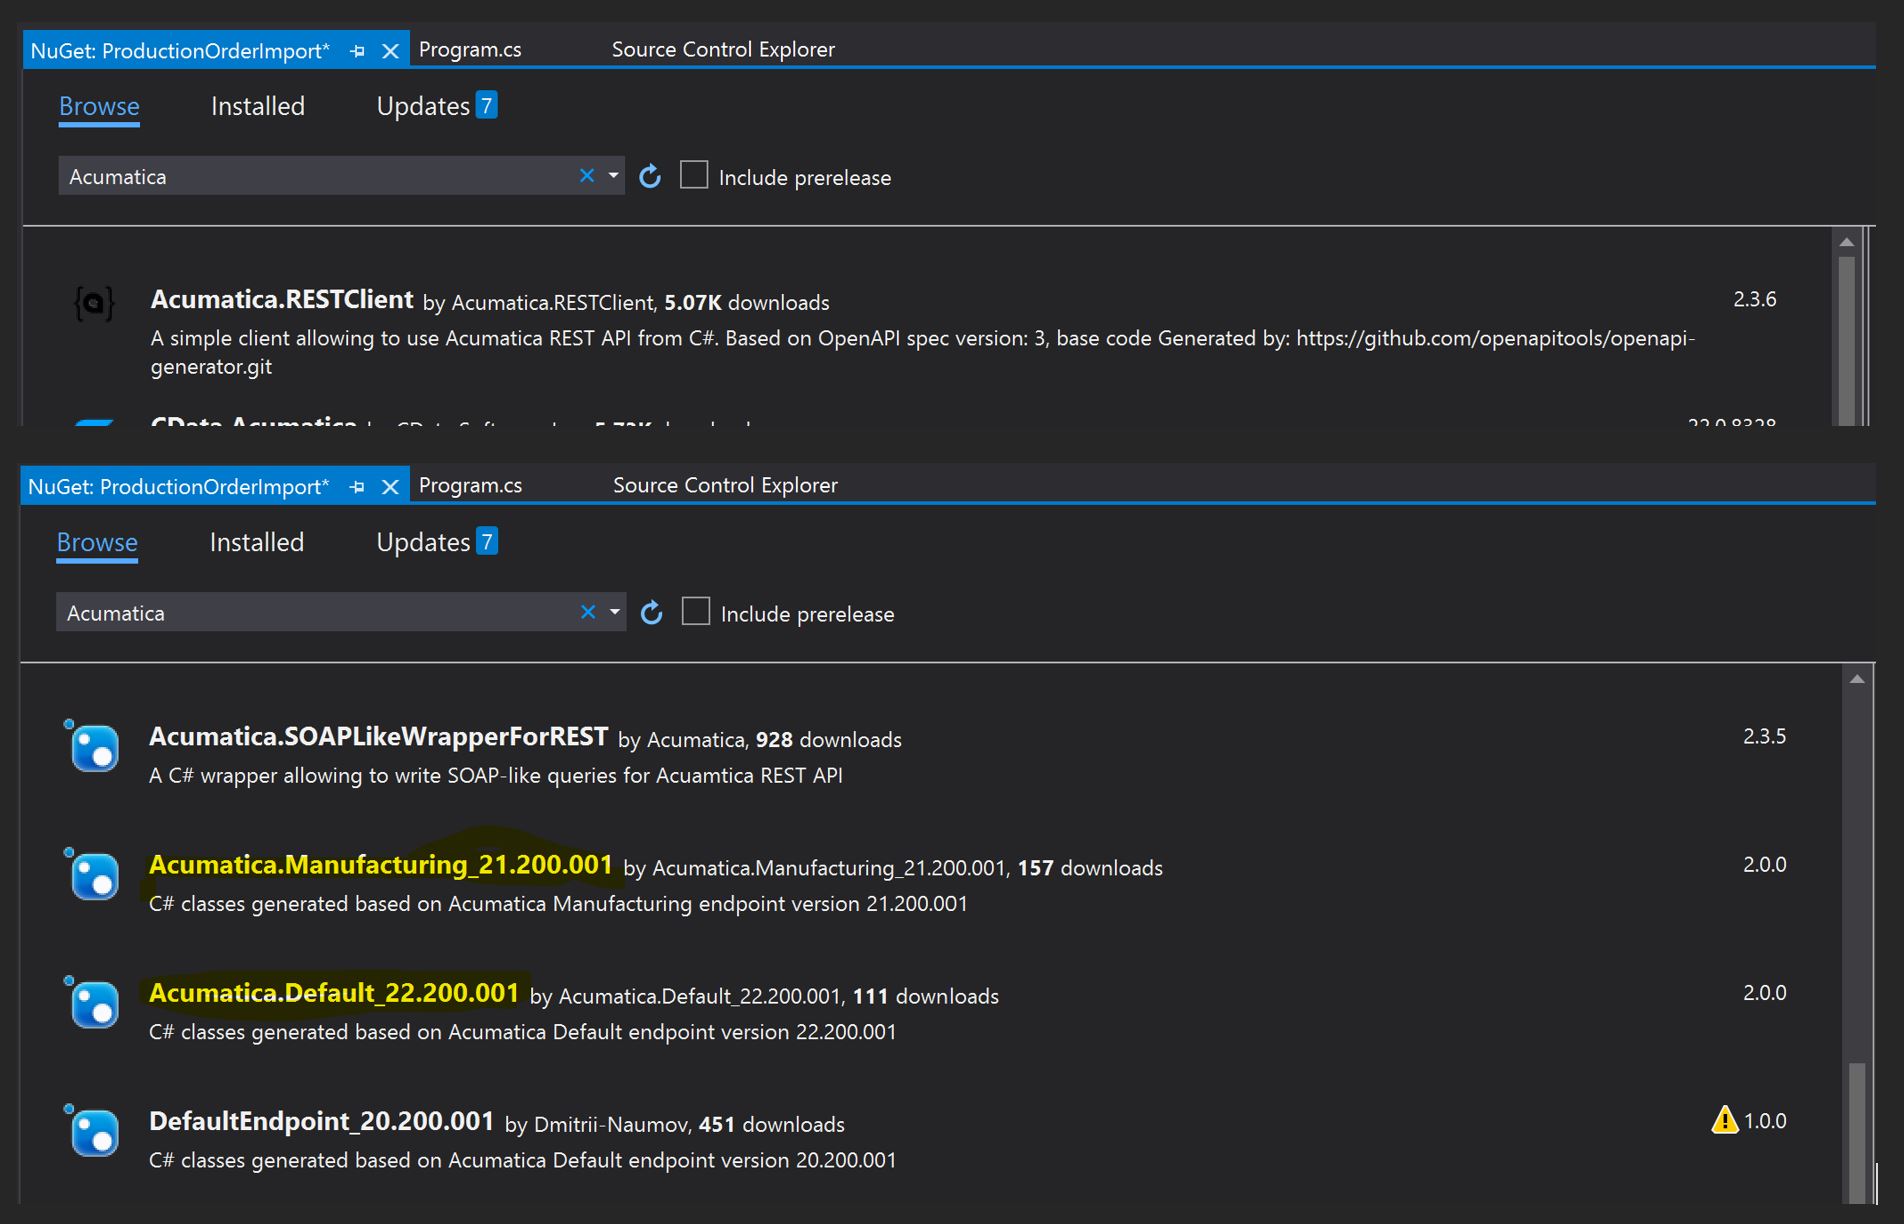
Once these packages are in place, the next step is to add the “using” statements. Note that I want to include both the Acumatica.Default…. and Acumatica.Manufacturing…. references as I need both endpoints to be available.
GIST: https://gist.github.com/dianecawley/c97fc8b5f2021281eced67e7cba7231e
In the Acumatica University training sessions, I310, I320, and I330, the examples are all shown using Postman calls. While this works, it is time-consuming and not very elegant to set up the REST commands and execute them strictly with HTTPS calls. Because the endpoint Api and Model namespaces are being used in our solution, we can take advantage of serialization and make the code much more readable.
Our first task is to create and then release an Inventory Adjustment transaction. The Postman call to create the transaction is a basic PUT and looks like this:
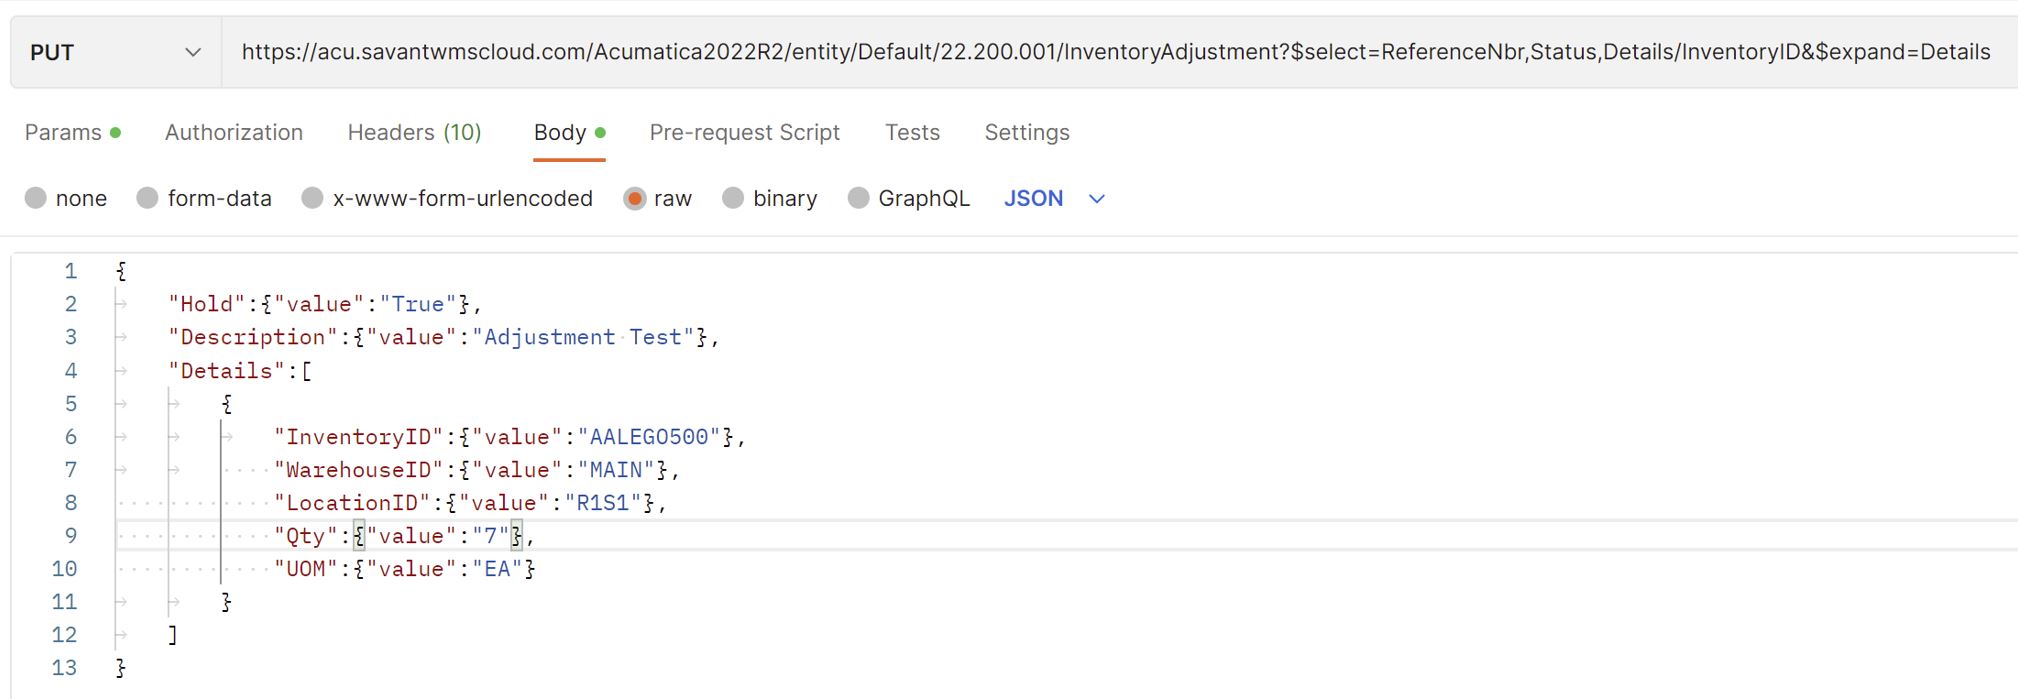
However, by using the RESTClient, we can use the Models associated with the DEFAULT endpoint; which in this case is the InventoryAdjusment and the InventoryAdjustmentDetail.
To log in, we instantiate the authApi, then request an AccessToken using the Connected Application ClientID & Secret, along with a valid User ID and Password.
GIST: https://gist.github.com/dianecawley/963c24f95c940cc7f8b6b71b8d84df57
If we look at the request log file, which is generated by the RESTClient, we can see that after the token is created, the PUT command is configured to match what we were seeing in Postman, and the Release Action is executed as a POST command. Note that the command URL was automatically generated to the appropriate DEFAULT endpoint address. This is due to the InventoryAdjustmentApi object.
Request
Method: Put
Body: {"Date":{"value":"2022-12-22T00:00:00"},"Details":[{"InventoryID":{"value":"AALEGO500"},"LocationID":{"value":"R1S1"},"LotSerialNbr":{"value":""},"Qty":{"value":7.000000},"ReasonCode":{"value":"INADJUST"},"UOM":{"value":"EA "},"WarehouseID":{"value":"WHOLESALE"}}],"Hold":{"value":false}}
—————————————–
Response
Status code: OK
Content: {"id":"1e0607b7-7a86-ed11-8688-020017045e71","rowNumber":1,"note":{"value":""},"Date":{"value":"2022-12-22T00:00:00+00:00"},"Details":[],"Hold":{"value":false},"ReferenceNbr":{"value":"000159"},"custom":{},"_links":{"self":"/AcumaticaDB2022R2/entity/Default/22.200.001/InventoryAdjustment/1e0607b7-7a86-ed11-8688-020017045e71","files:put":"/AcumaticaDB2022R2/entity/Default/22.200.001/files/PX.Objects.IN.INAdjustmentEntry/adjustment/1e0607b7-7a86-ed11-8688-020017045e71/{filename}"}}
—————————————–
Request
Method: Post
Body: {"entity":{"Date":{"value":"2022-12-21T17:00:00-07:00"},"Details":[],"Hold":{"value":false},"ReferenceNbr":{"value":"000159"},"note":{"value":""},"id":"1e0607b7-7a86-ed11-8688-020017045e71","rowNumber":1,"custom":{}}}
—————————————–
Response
Status code: Accepted
Content:
—————————————–
So now, we want to create a Manufacturing Labor transaction, based on data in the third-party database. In this example, we create the LaborEntry and LaborEntryDetail objects, with appropriate data fields. Then we Save the transaction using a PUT command and Release it using the POST.
Using the same configuration object from the initial login, and therefore the same token as in the Inventory Adjustment example, the code is below. Notice that there are two interesting differences: (1) the Labor Time must be formatted to HH:MM (or DD:HH:MM if more than 24 hours); and (2) this example also includes populating an attribute on the Production Order called MACHINE.
GIST: https://gist.github.com/dianecawley/27ec111c700133afa3b7caeafefd75e9
Here is the associated Request Log for the above transaction (minus the POST). See how the URL is configured to look at the MANUFACTURING endpoint instead of the DEFAULT, which was the case with the Inventory Adjustment. This did not require any specific code within the main application itself. The RESTClient took care of this detail.
Request
Method: Put
Body: {"Date":{"value":"2022-12-27T00:00:00"},"Description":{"value":"Labor"}, "Details":[{"EmployeeID":{"value":"EP00000002"},"LaborTime":{"value":"00:05"},"LaborType":{"value":"Direct"},"Location":{"value":"1"},"LotSerialNbr":{"value":""},"OperationNbr":{"value":"0010"},"OrderType":{"value":"RO"},"ProductionNbr":{"value":"AM000002"},"Quantity":{"value":1.0},"Shift":{"value":"0001"},"Warehouse":{"value":"WHOLESALE"}}],"Hold":{"value":true}}
—————————————–
Response
Status code: OK
Content: {"id":"ca4b97c9-7b86-ed11-8688-020017045e71","rowNumber":1,"note":null,"BatchNbr":{"value":"AMB000040"},"Date":{"value":"2022-12-27T00:00:00+00:00"},"Description":{"value":"Labor"}, "Details":[],"Hold":{"value":true},"custom":{},"_links":{"self":"/AcumaticaDB2022R2/entity/MANUFACTURING/21.200.001/LaborEntry/ca4b97c9-7b86-ed11-8688-020017045e71","files:put":"/AcumaticaDB2022R2/entity/MANUFACTURING/21.200.001/files/PX.Objects.AM.LaborEntry/batch/ca4b97c9-7b86-ed11-8688-020017045e71/{filename}"}}
—————————————–
Request
Method: Put
Body: {"BatchNbr":{"value":"AMB000040"},"Date":{"value":"2022-12-26T17:00:00-07:00"},"Description":{"value":"Labor"},"Details":[],"Hold":{"value":false},"id":"ca4b97c9-7b86-ed11-8688-020017045e71","rowNumber":1,"custom":{}}
—————————————–
Response
Status code: OK
Content: {"id":"ca4b97c9-7b86-ed11-8688-020017045e71","rowNumber":1,"note":null,"BatchNbr":{"value":"AMB000040"},"Date":{"value":"2022-12-27T00:00:00+00:00"},"Description":{"value":"Labor"},"Hold":{"value":false},"custom":{},"_links":{"self":"/AcumaticaDB2022R2/entity/MANUFACTURING/21.200.001/LaborEntry/ca4b97c9-7b86-ed11-8688-020017045e71","files:put":"/AcumaticaDB2022R2/entity/MANUFACTURING/21.200.001/files/PX.Objects.AM.LaborEntry/batch/ca4b97c9-7b86-ed11-8688-020017045e71/{filename}"}}
—————————————–
Conclusion
Using the RESTClient in your integration code can eliminate a lot of manual effort in formatting REST API calls, and by using the models for the DEFAULT or MANUFACTURING endpoints, there is less room for error because the data types and fields are already defined. It is easy to use multiple endpoint definitions in one set of code, and the RESTClient will sort out the proper URL and body for the REST API calls without needing to request multiple tokens. Using a single token will reduce the number of concurrent login sessions, and will reduce the overall number of API calls to Acumatica. This also is important due to Acumatica licensing restrictions.
Happy Coding!